Training course 

1

2

3

4


 1.  I created a new layer over it.  

 2.  1 did a black-and- white sketch of all I wanted to use from the photo, and re-designed some elements to give it the  look I wanted.

 3.  1 then used that sketch as the background for my painting, and resampled it to a larger format for better output, as shown in Figure 1.  


Figure 2 

    How did I manipulate my brushes to create these effects?

I can't describe it, because  each time it is different!

4.  Once all the elements were in place, I created a couple of custom brushes to start with, then I simply used those brushes as I would use my regular paintbrushes.

5.  By using the Brush tool dockers, playing with the transparency settings, sizes, and rotation, I was able to simulate the way that I normally paint. 

6.  Next, I used the Eyedropper to pick certain colors that I linked from the original picture.

7.  I chose complimentary colors from the Color docker, to paint shadows and highlights. 

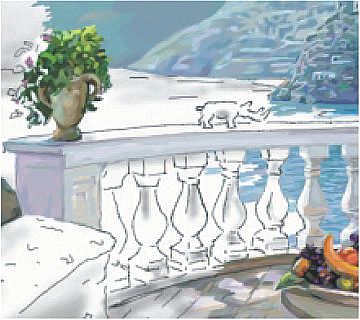
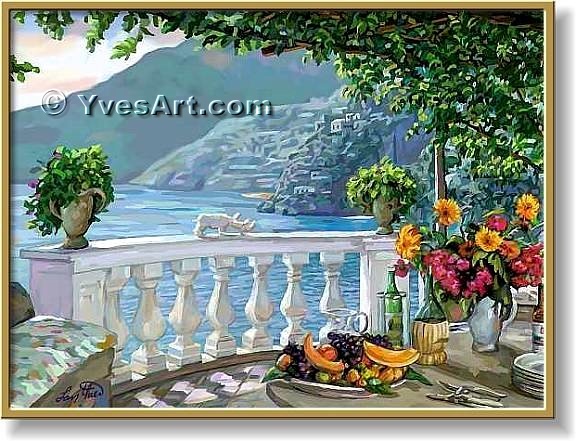
Like anything else, it takes time and con- centration to create something beautiful. I hope that when you look at Figure 3, you will feel I succeeded.

  The Gardens Scene

This piece was based on an  original  large-  format Trompe L'Oeil mural that I created on canvas for a customer here in the state of  Florida.

Figure 3

Working with a computer is very close to painting with  real colors, except you don't get dirty. 

I love it!


Figure 2 shows a section of the painting after adding some detail, texture, and color.

 I often use shortcuts in my murals, and they save me time on large areas, but I always go back and finish them.


 Move your pointer on the Zoom area to see a close-up    


For more information on our product and services,

please call: Tel: USA  (321) 257-9294. 


 Home


© 1995-2023 YvesArt.com All rights reserved.